This particular project was primarily a kitchen repainting commission, with the clients having contacted me wanting to update the look of their kitchen by repainting the cabinets in a more contemporary colour.
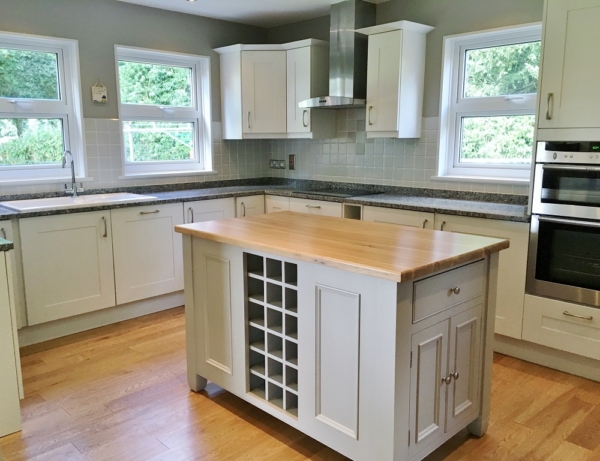
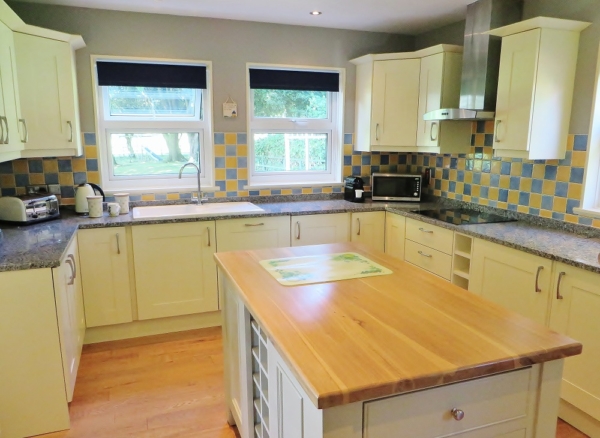
Over the years I have written various pieces about repainting kitchens – the do’s, the don’ts, the stages and the best materials, so for this Blog I thought I’d concentrate on the other major part of the project, painting the tiles.
During the initial consultation we looked at new colour options for both the kitchen units and the walls and also discussed their plans for the tiles. As you can see from the picture above, the boldly coloured checker board style of the current tiles was adding to the dated look of the kitchen. Their plans were to replace these tiles with something more modern and neutral, though they mentioned they weren’t keen on all the mess and the potential damage this might bring. They couldn’t however see an alternative, until I mentioned painting them….
Like many people their primary reference point for painted tiles was public areas and pub loos, most of which are very poorly done, with the paint quickly peeling off and brush strokes a plenty. There were therefore naturally a bit skeptical that it would look good and be durable. I explained that will a bit of time, the right prep, the right products, and quality painting, their tiles would not only look brilliant, but also be highly durable and more than up to the rigors of a kitchens’ everyday use.
Painting Kitchen Tiles – The Process
Like any good painting job the key is in the preparation and the application, below is a list of the stages I used to achieve the silky smooth and durable look you can see in the pics below.
(1) Clean/degrease
(2) Lightly sand with 180 grit sanding pads.
(3) Apply a coat of high adhesion shellac primer, wait till dry and sand smooth.
(4) Apply a coat of high adhesion oil based primer, and ‘lay off’ with a soft brush. Once dry lightly sand with 320 grit.
(5) Apply two coats of quality oil eggshell paint and ‘lay off’ with a soft brush. Lightly sand between coats.
(6) Re-establish grout lines with a grout pen.
(7) Apply 2 coats Varnish (Satin) with 2 different types of roller.
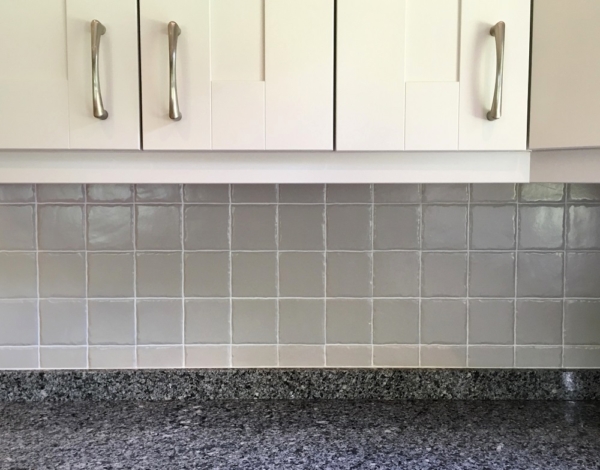
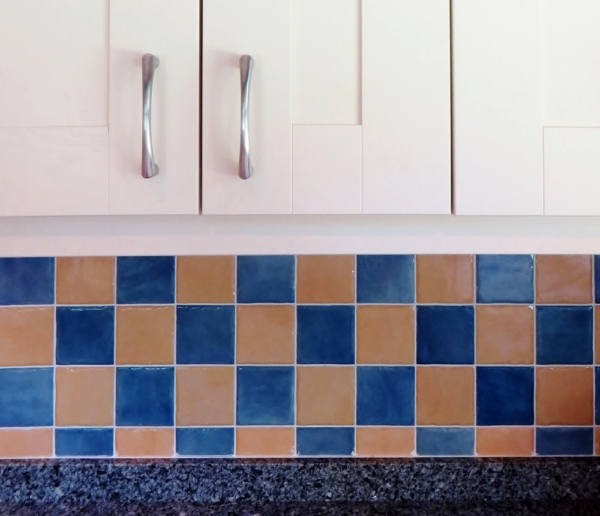
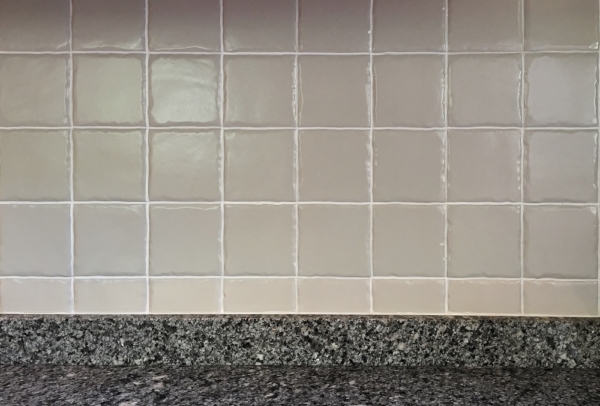
The results speak for themselves, brand new quality looking tiles without all the faff, mess and expense, result! :-). My clients were absolutely thrilled with the results and were kind enough to email this lovely testimonial after the project was completed –
‘Lee finished the job of hand-painting our solid-wood kitchen cabinets and ceramic tiles within the time frame and budget agreed. Although the time-frame and consequent disruption to our living conditions was lengthy Lee was meticulous in his preparation and the finished job was excellent. The transformation of the tiles through painting and lacquering was particularly impressive – you wouldn’t believe they are not newly glazed tiles and without the mess and hassle of replacing them. Lee is not the cheapest nor the quickest but he ensures excellent quality and value for money.’
R Martin, Goldsborough
Thanks for reading my Blog, if you would like to see the main page for this project please visit http://imaginativeinteriors.co.uk/kitchen-repaint-with-painted-tiles/